How To Blanch Veggies For The Freezer
This post may contain Affiliate Links
If you have some extra vegetables but are unsure of what to do with them, why not try freezing them to prolong their life and help reduce food waste?
Here’s how to blanch veggies for the freezer.
Freezing vegetables that are starting to look a little bit dodgy is a great way to save money and prevent food from being wasted.
However, it’s not always a case of just being able to chuck vegetables in the freezer as they are.
Why Do I Need To Blanch Vegetables Before Freezing?
Most vegetables have a high water content, which means if you put them in the freezer without blanching first when you cook or defrost them they will likely be a soggy mess.
Blanching is a quick and easy process that ensures your vegetables will be in tip-top condition when removed from the freezer.
Blanching Veggies: What Is Flash Freezing?
As well as bleaching my veggies, I add an extra step to the process known as flash freezing.
While you don’t have to do this step, it does stop the vegetables all from sticking together in one large clump and makes it easier to split them down into smaller portions.
Flash freezing involves laying the vegetables out on a tray and then freezing for an hour or two until solid. The individual vegetables can then be separated into containers or bags and kept in the freezer until needed.
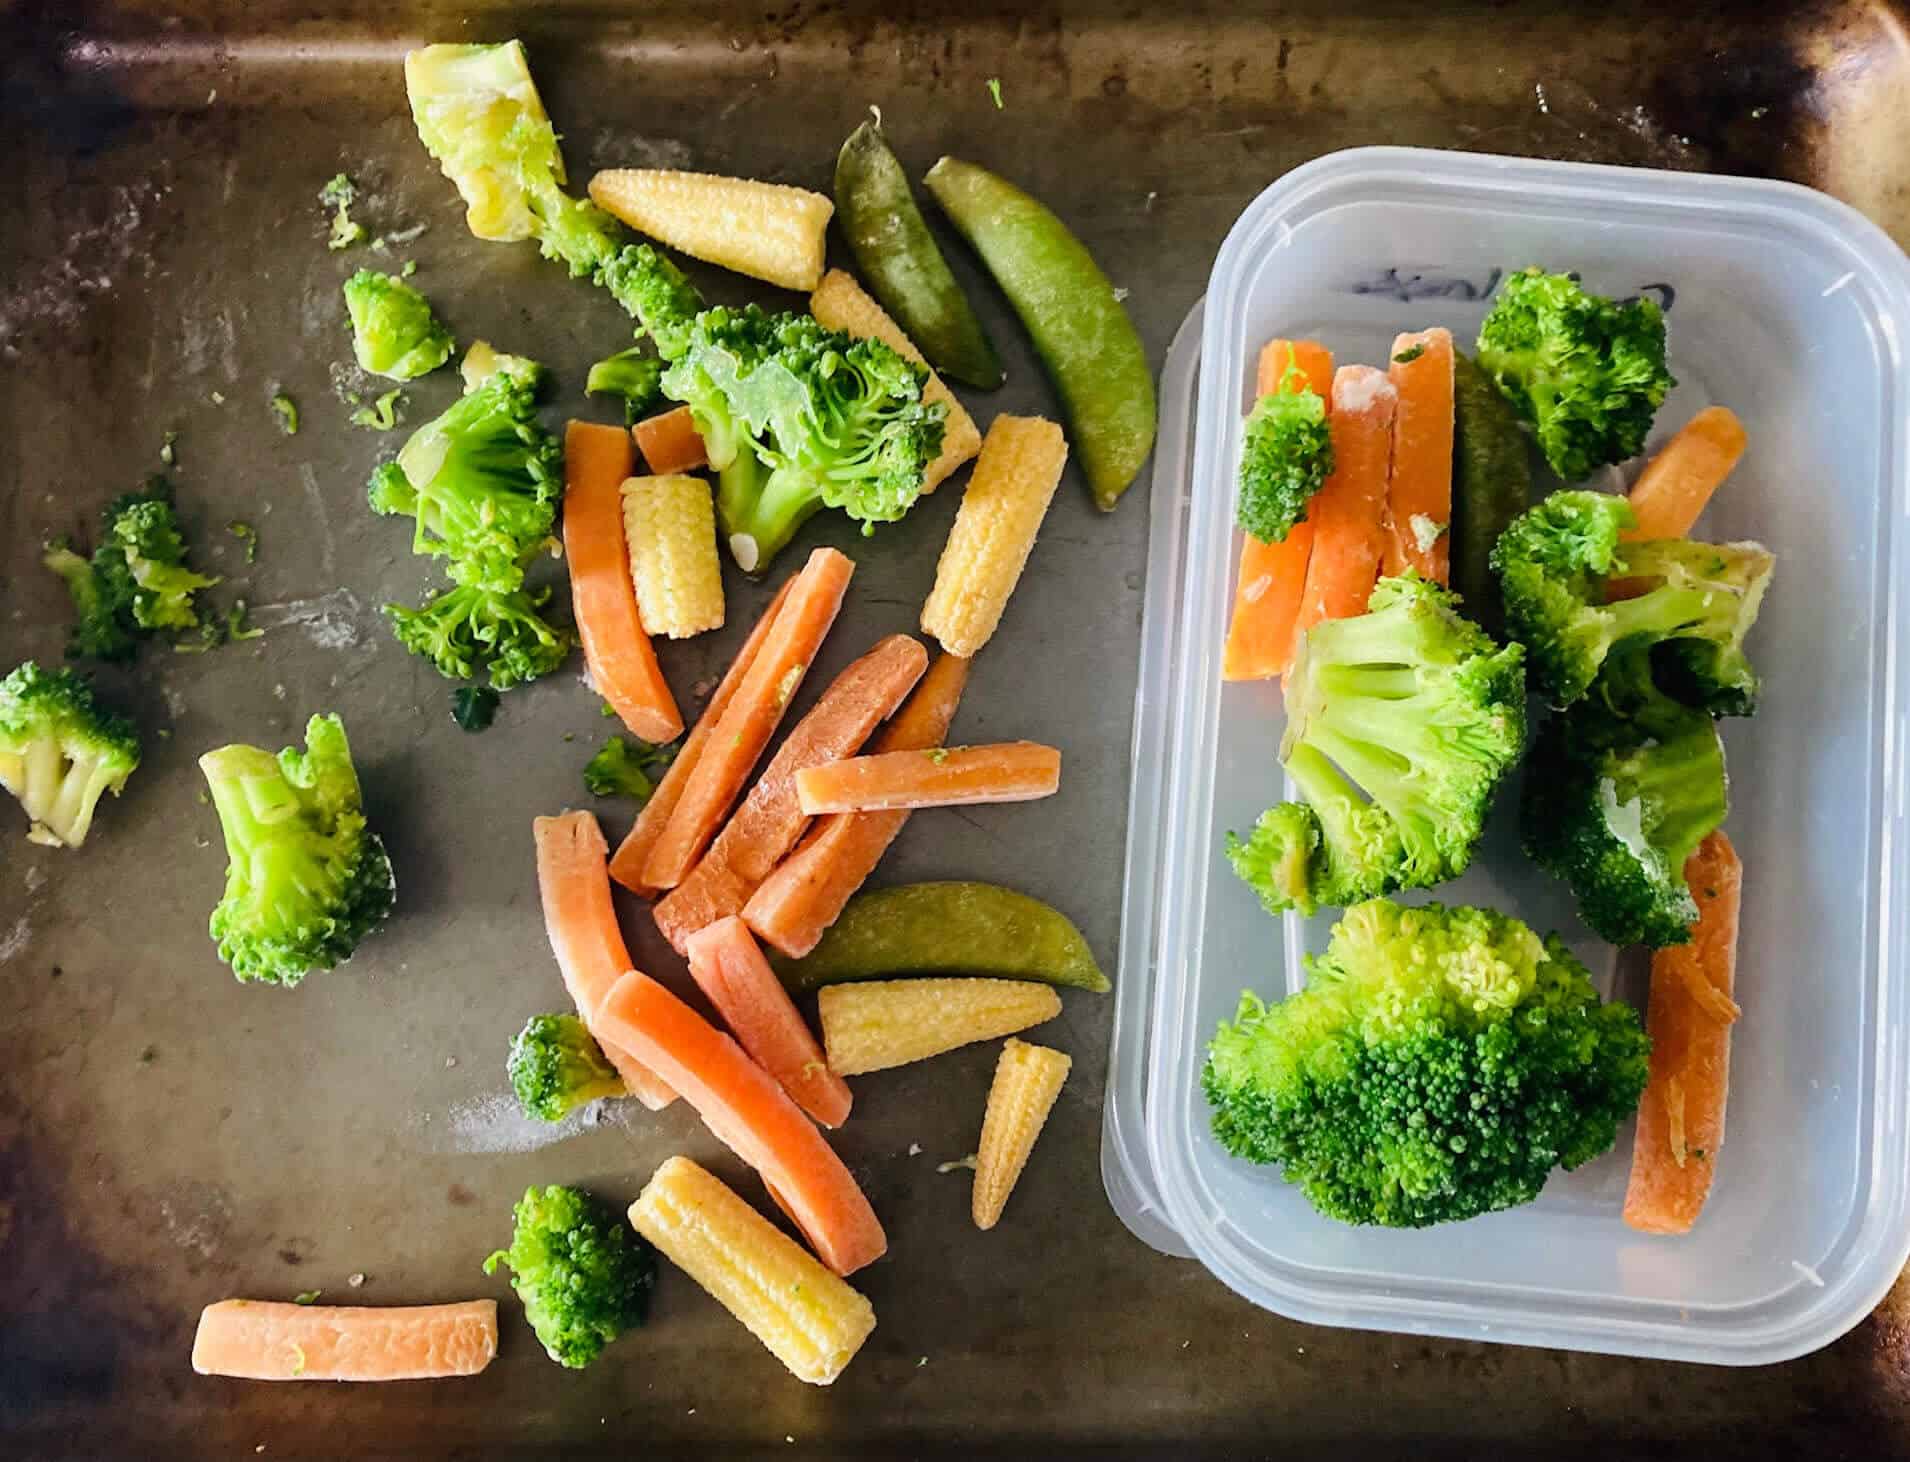
Using this method makes it much easier to take out a few vegetables from the freezer at a time rather than needing to use them all at once because they are in a big frozen clump.
Now, you might be thinking this sounds like a lot of effort just to save a few veggies from going in the bin. But with the cost of living crisis worsening every day, I know people will be keen to reduce their food waste as much as they can.
It’s also a great option if you find a lot of yellow sticker items in the supermarket or have a glut of veggies from the allotment or vegetable patch.

How Long Should I Blanch Vegetables For?
Vegetables only need blanching for a few minutes – usually 3-5 minutes. You may want to go with three minutes for green vegetables and five minutes for root vegetables such as parsnips and carrots.
How To Blanch Veggies For The Freezer
Here’s how to blanch veggies for the freezer in 7 easy steps.
Blanching Vegetables – You Will Need:
- A large saucepan
- Pinch of Salt – this is optional and can skip if you’re weaning a little one or on a low sodium diet.
- A large bowl filled with very cold water and ice cubes – No ice? No worries, you can run the bowl under the cold tap instead.
- A baking tray – some people prefer to line the baking tray with greaseproof paper to stop the vegetable from sticking when flash-freezing. I try to limit single-use products so didn’t use this.
- Freezer-safe containers – any kind will do, I used plastic tubs from the Chinese, you could ziplock bags, glass jars or Tupperware containers.
- A slotted spoon – for transferring the vegetables from the boiling water to the ice water.
For this guide, I blanched a pack of yellow sticker vegetables that had been hanging around in my freezer for ages but you can do this with pretty much any vegetables you like.

Remember that blanching starts and then quickly stops the cooking process, so vegetables will still need cooking when you use them from the freezer. The benefit of this is that they won’t become overcooked when you add them to a dish.
Green vegetables such as broccoli and cabbage will need less cooking time than carrots or parsnips so you want to do these in separate batches, although as the carrot batons were quite small in the bag I used, I did just chuck them all in together!
How To Blanch Veggies For The Freezer
- Wash, peel, and chop your vegetables if required.
- Fill the saucepan (around two-thirds full) with water and bring it to a strong rolling boil. This will ensure that the vegetables keep their colour once cooked.
- While waiting for the water to boil, add cold water and plenty of ice cubes to the bowl and bring it near to where you’ll be cooking the vegetables.
- Once the water is boiling, add the vegetables and a pinch of salt and cook for around three minutes (I usually set a timer using Alexa)
- When the time is up, use a slotted spoon to transfer the vegetables from the pan to the ice-cold water. If you don’t have any ice, run the bowl and its content under the tap for a few minutes instead.
- Once the vegetables are cold, place them on the baking tray ensuring there is space between them and place them in the freezer for around two hours or until solid.
- When the vegetables are frozen, remove them from the baking tray and place them into the freezer container with the label and the date.
Most vegetables will be fine for 3-6 months in the freezer, possibly longer but it’s always good to know exactly when they were frozen.